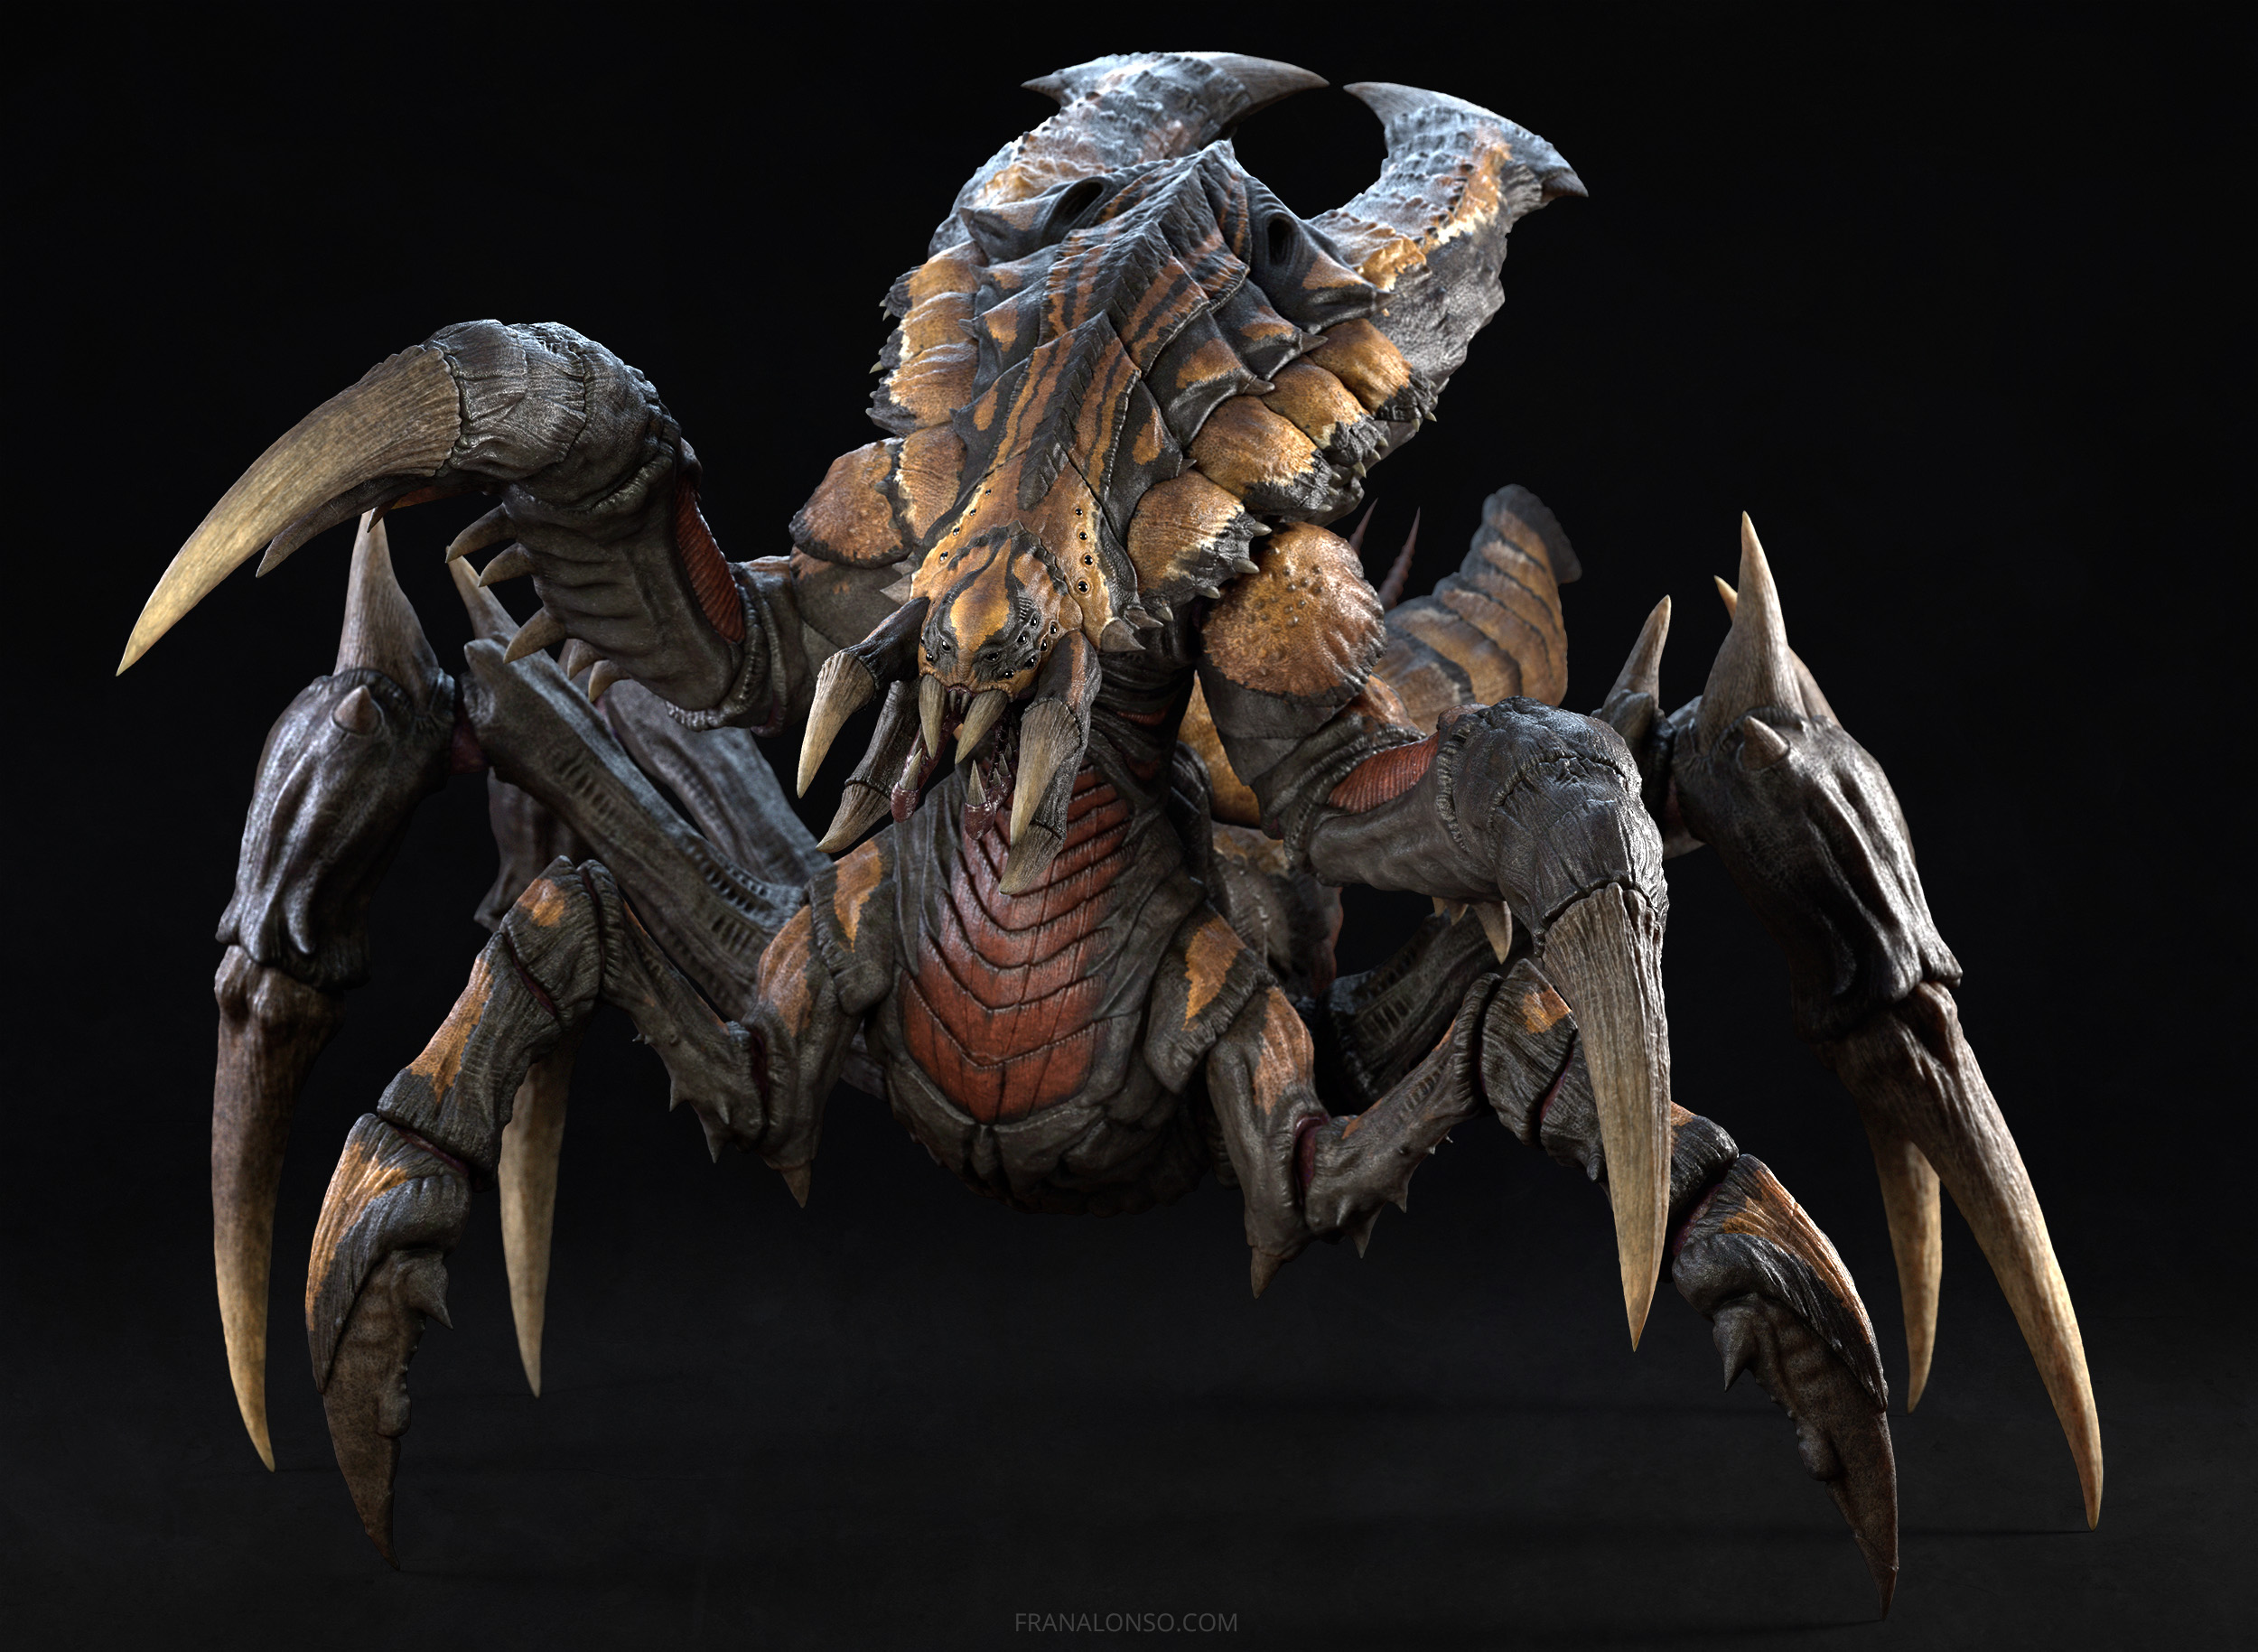
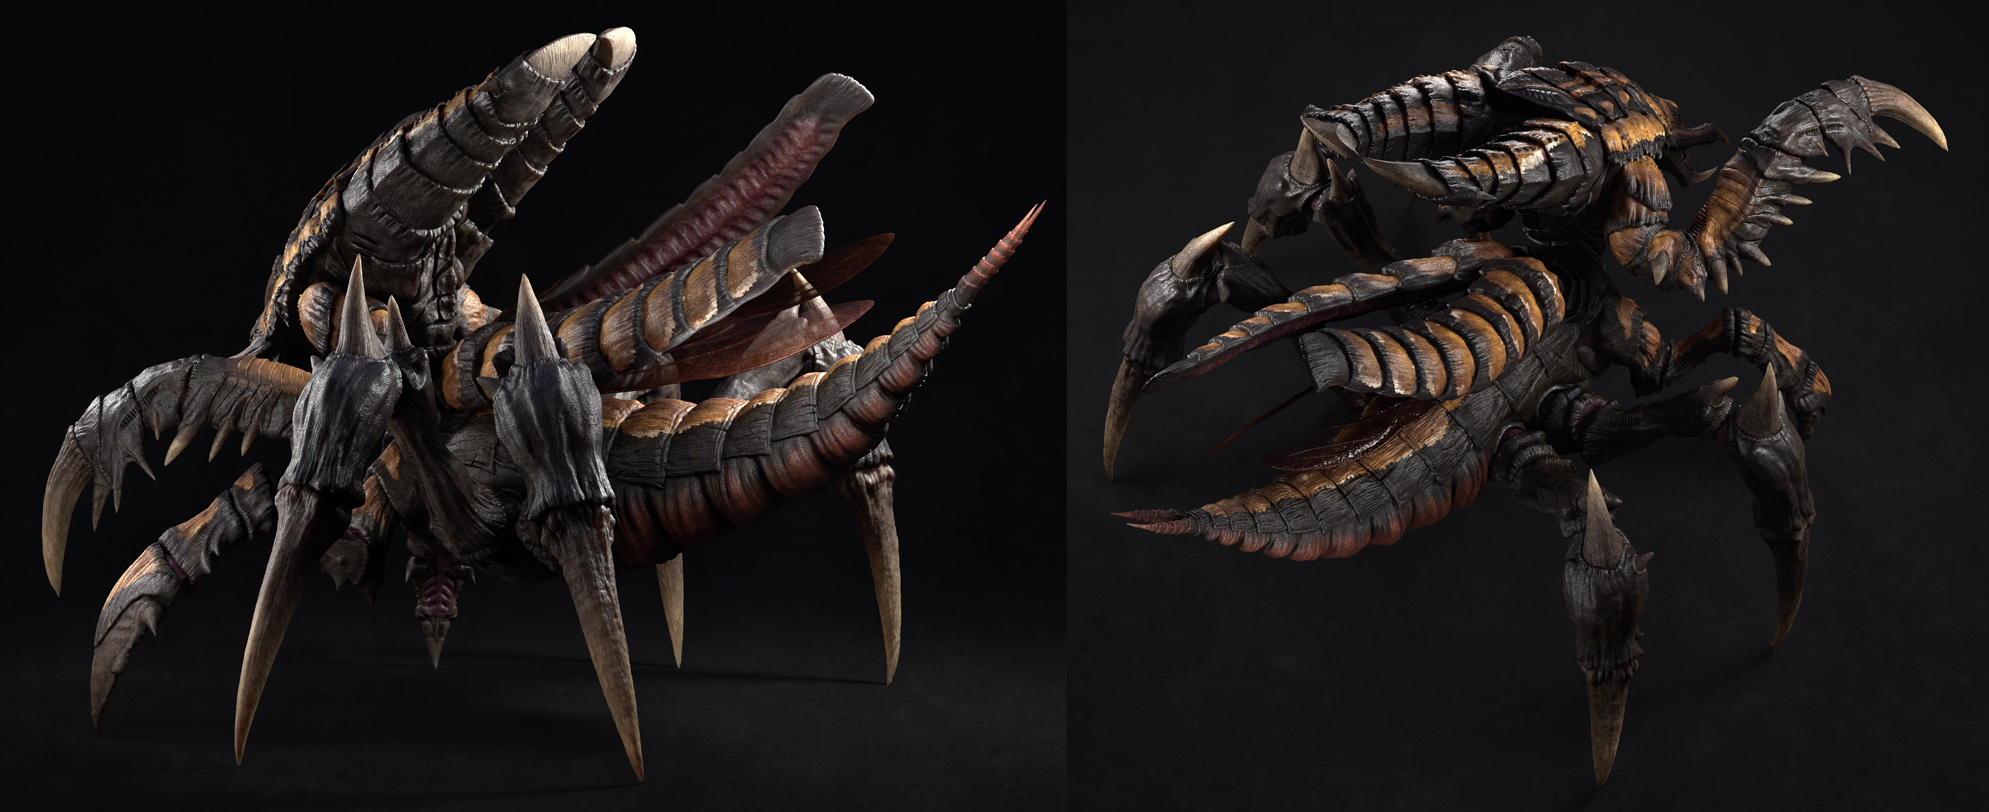
Goliath Breakdown
Introduction
Original published on 3Dtotal webiste. In this tutorial, I will take you though my workflow to create a creature for production. There are always different ways to reach the same result, this is just the approach I felt more comfortable with for this kind of creature. I hope you find it useful.
Gathering references
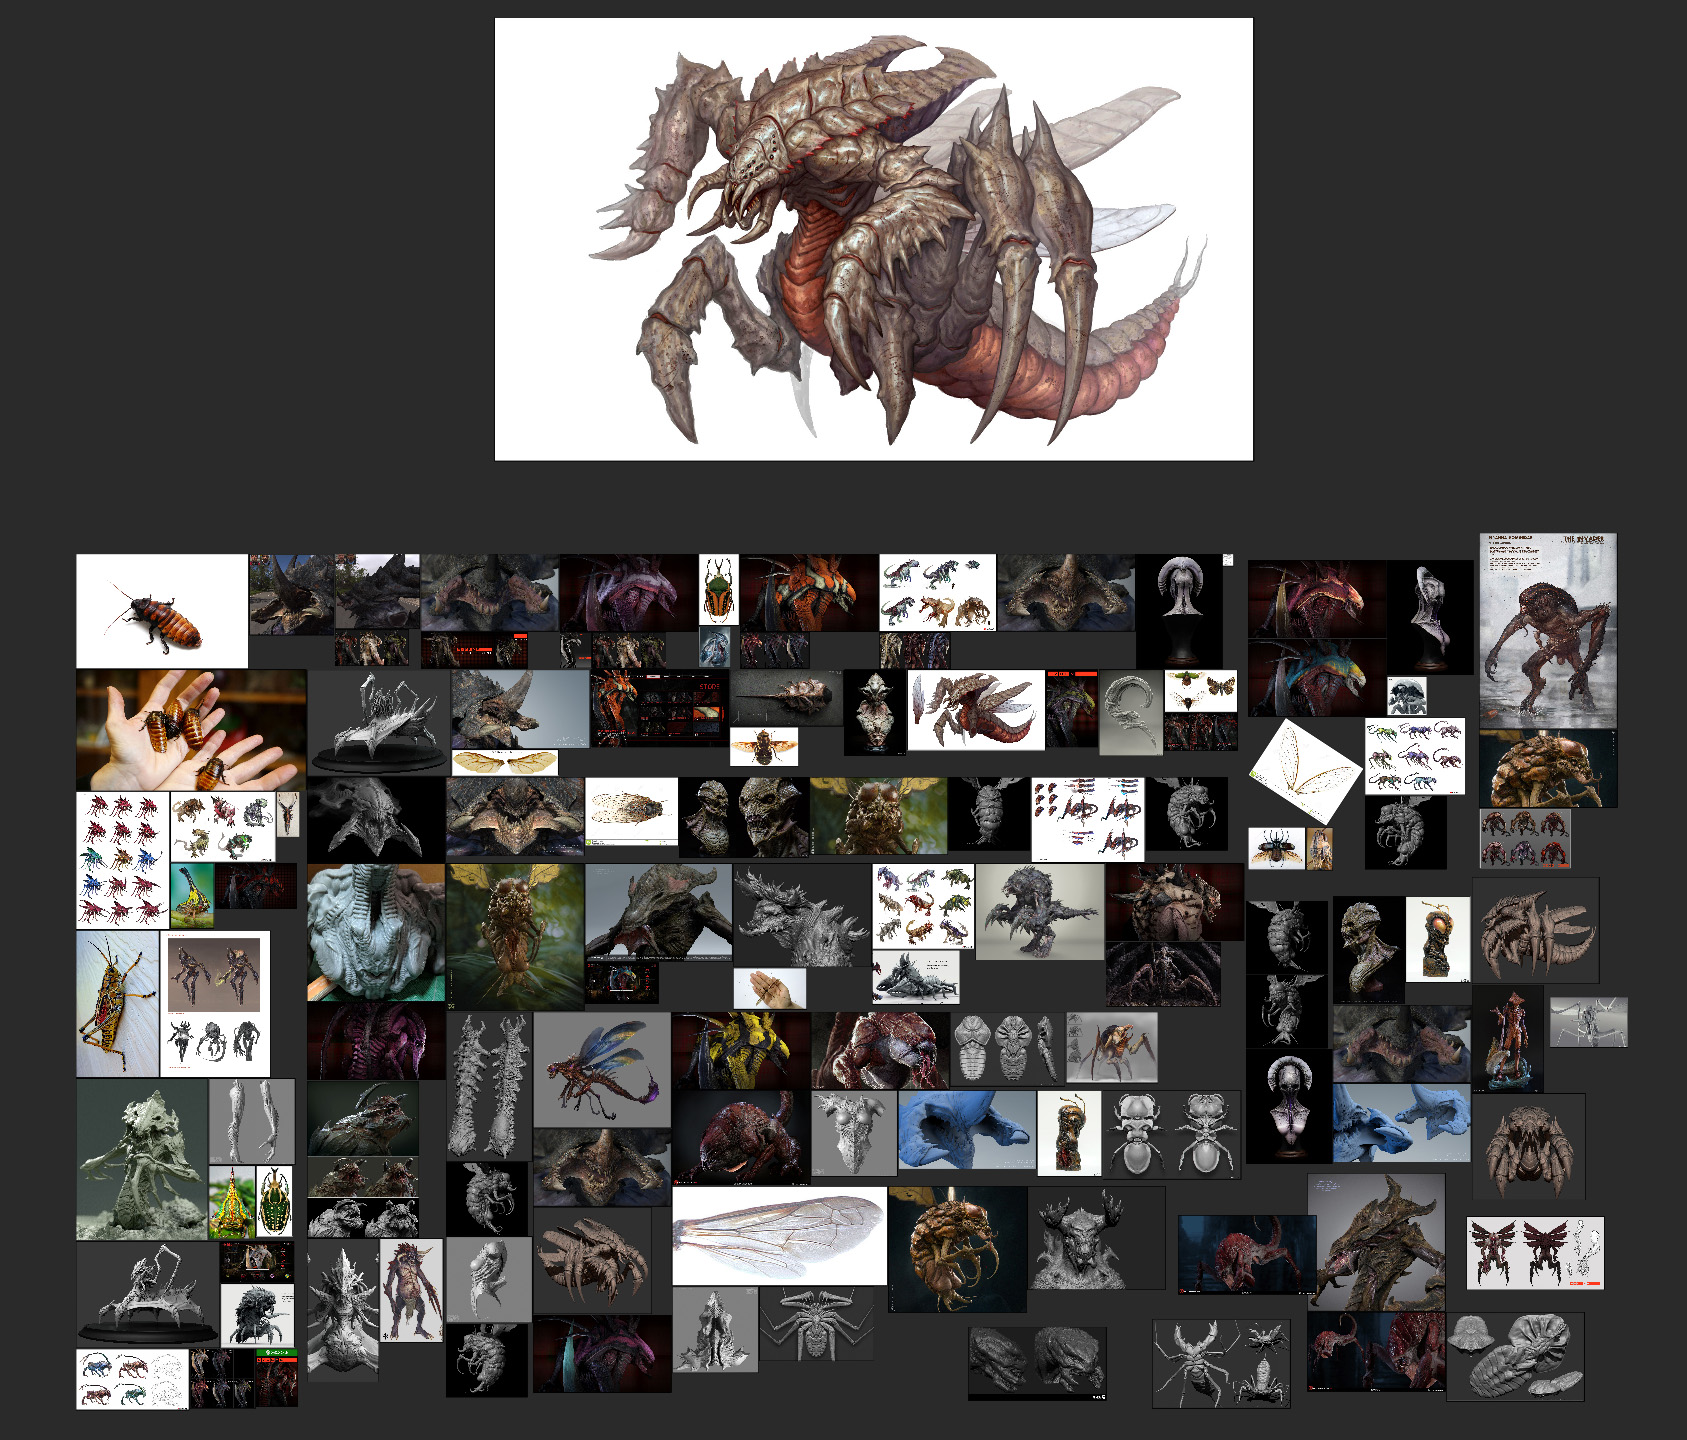
Whether I’m starting from scratch or based on a concept, I always spend some time gathering references that will lead me to new ideas that will enhance the end result. For creature work, I like to find as many references as I can from sources like nature, real animals, and so on, so I can understand how organic shapes are formed and apply these to the final piece, and therefore giving a realistic look to it.
On this project I was inspired by the great concept by Anatolii Leoshko. I used his artwork as reference for the primary and secondary shapes. For the detailing pass I decided to take it more to the insects realm rather than the crab look of the concept.
Modeling part 1: primary shapes
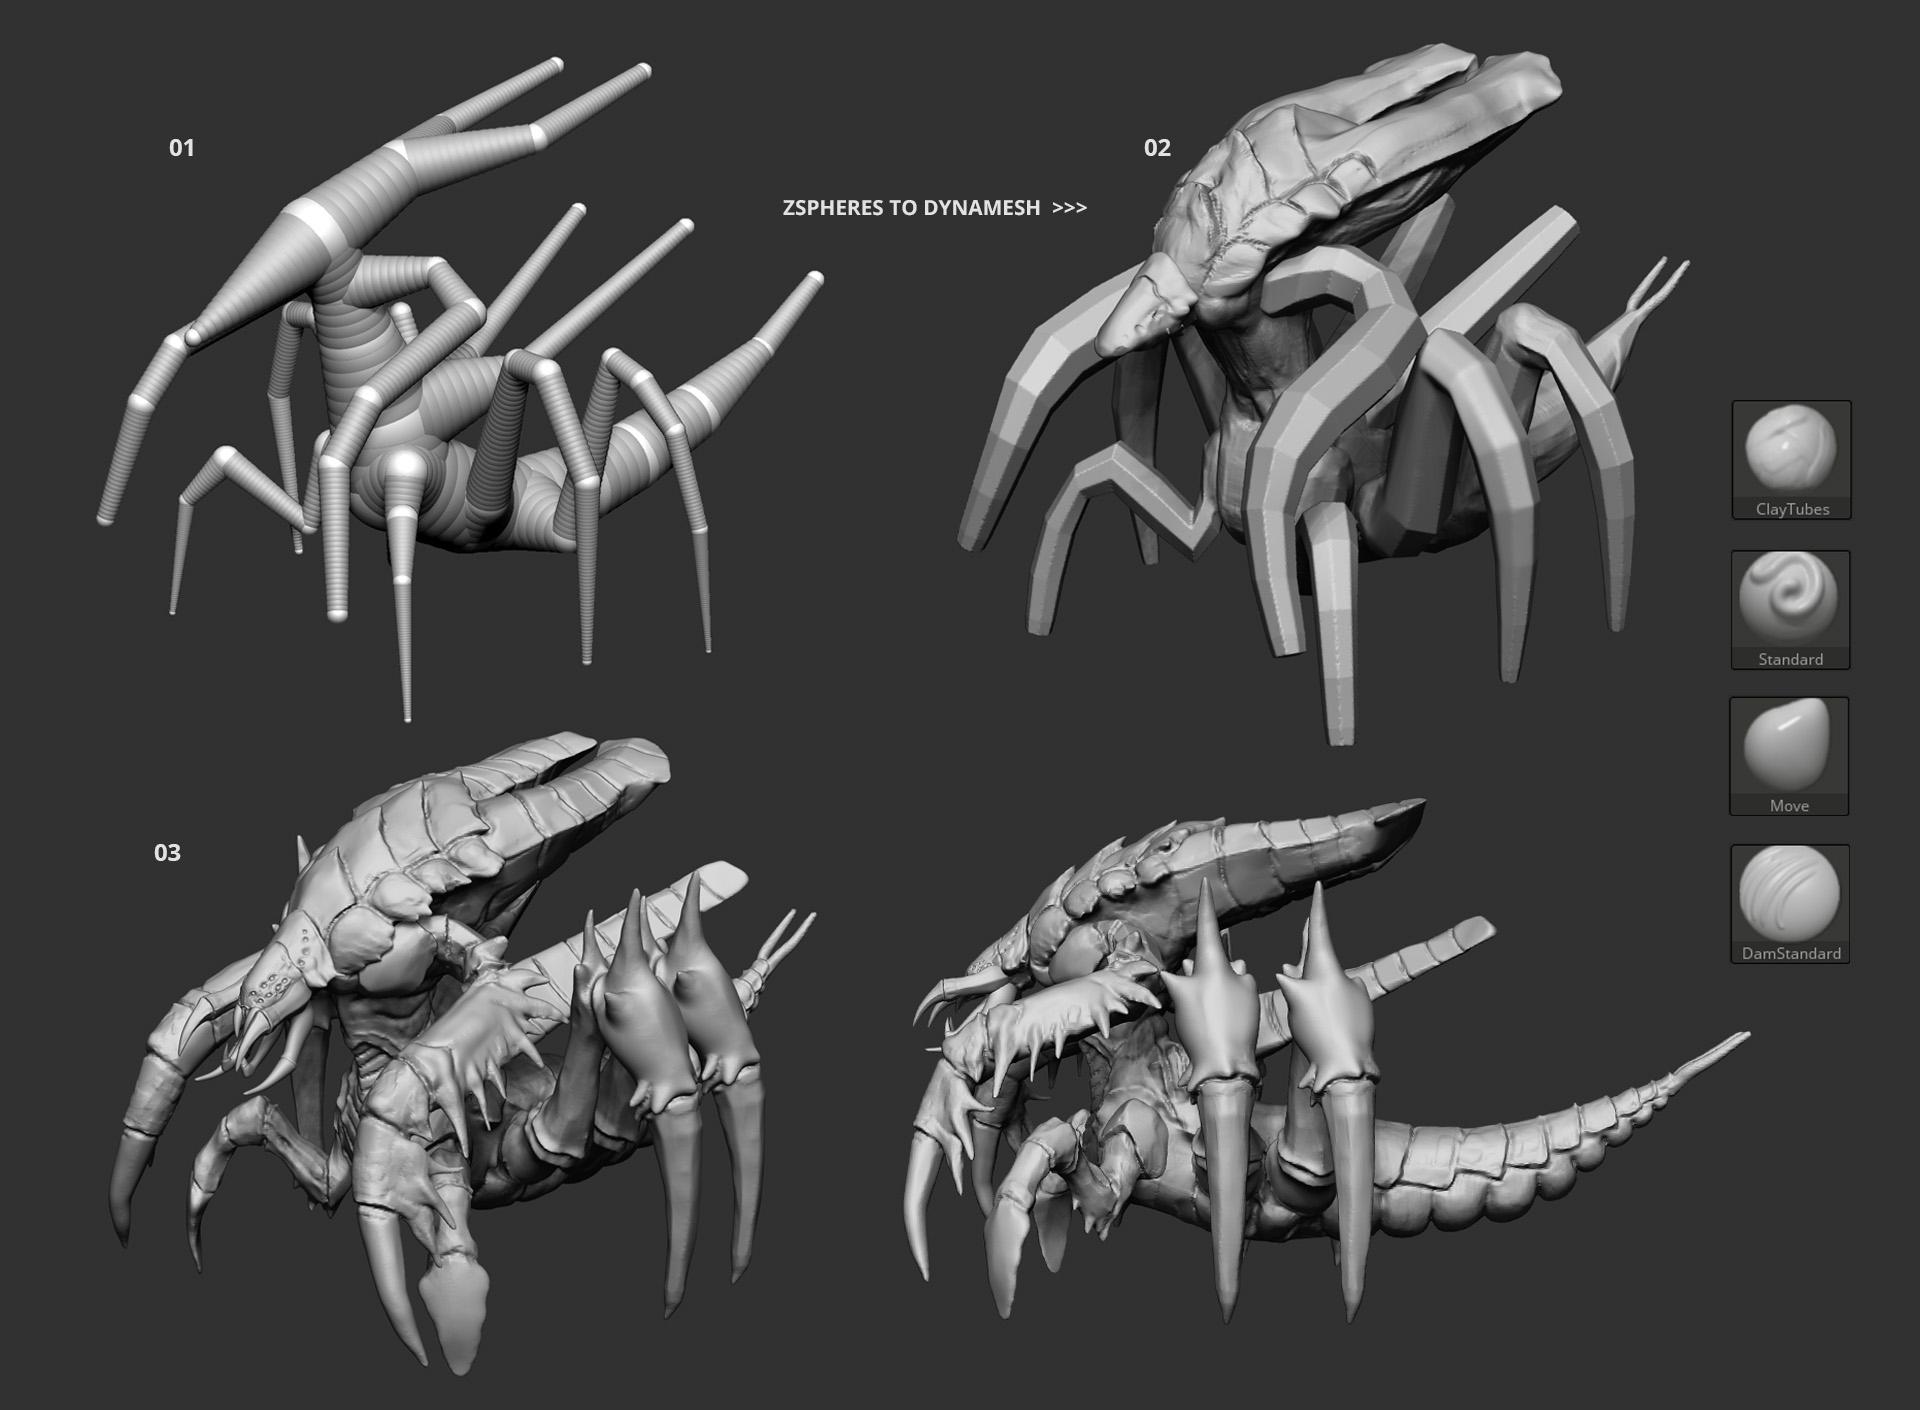
My main modeling tool was ZBrush. I started by placing some ZSpheres in position to block out the general proportions and silhouette of the creature. Once I was happy with it, I converted the adaptive skin to dynamesh in order for me to shape more specific volumes, without getting into much detail, just enough resolution to emphasize all the different parts of this model.
Modeling part 2: secondary shapes
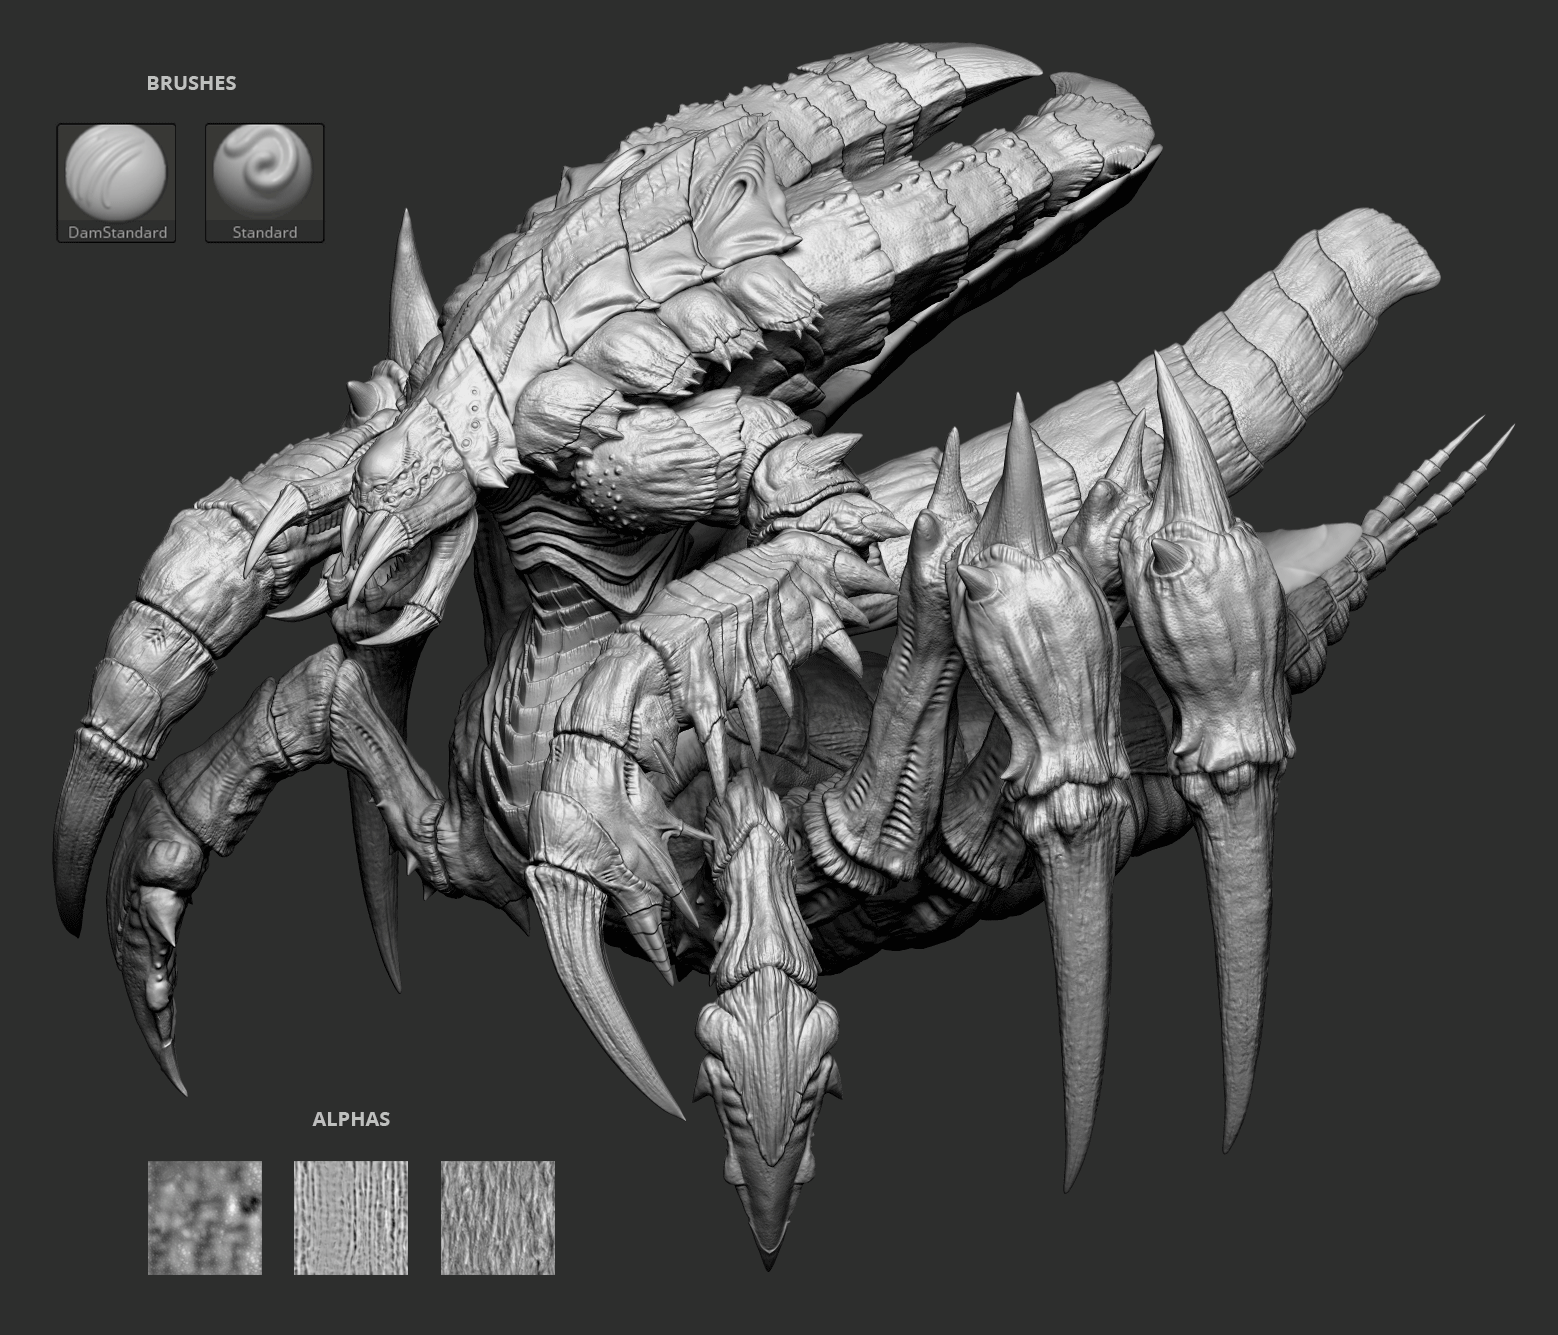
After defining these main shapes, I start dividing the creature into around 40 smaller parts by masking out and splitting into SubTools. This allows me a more comfortable way to work each single piece individually and increase the dynamesh resolution. During the modeling of the main and secondary shapes, the brushes I used 90% of the time were Standard, Move, ClayTubes, and DamStandard.
Retopo, UVs & details projection
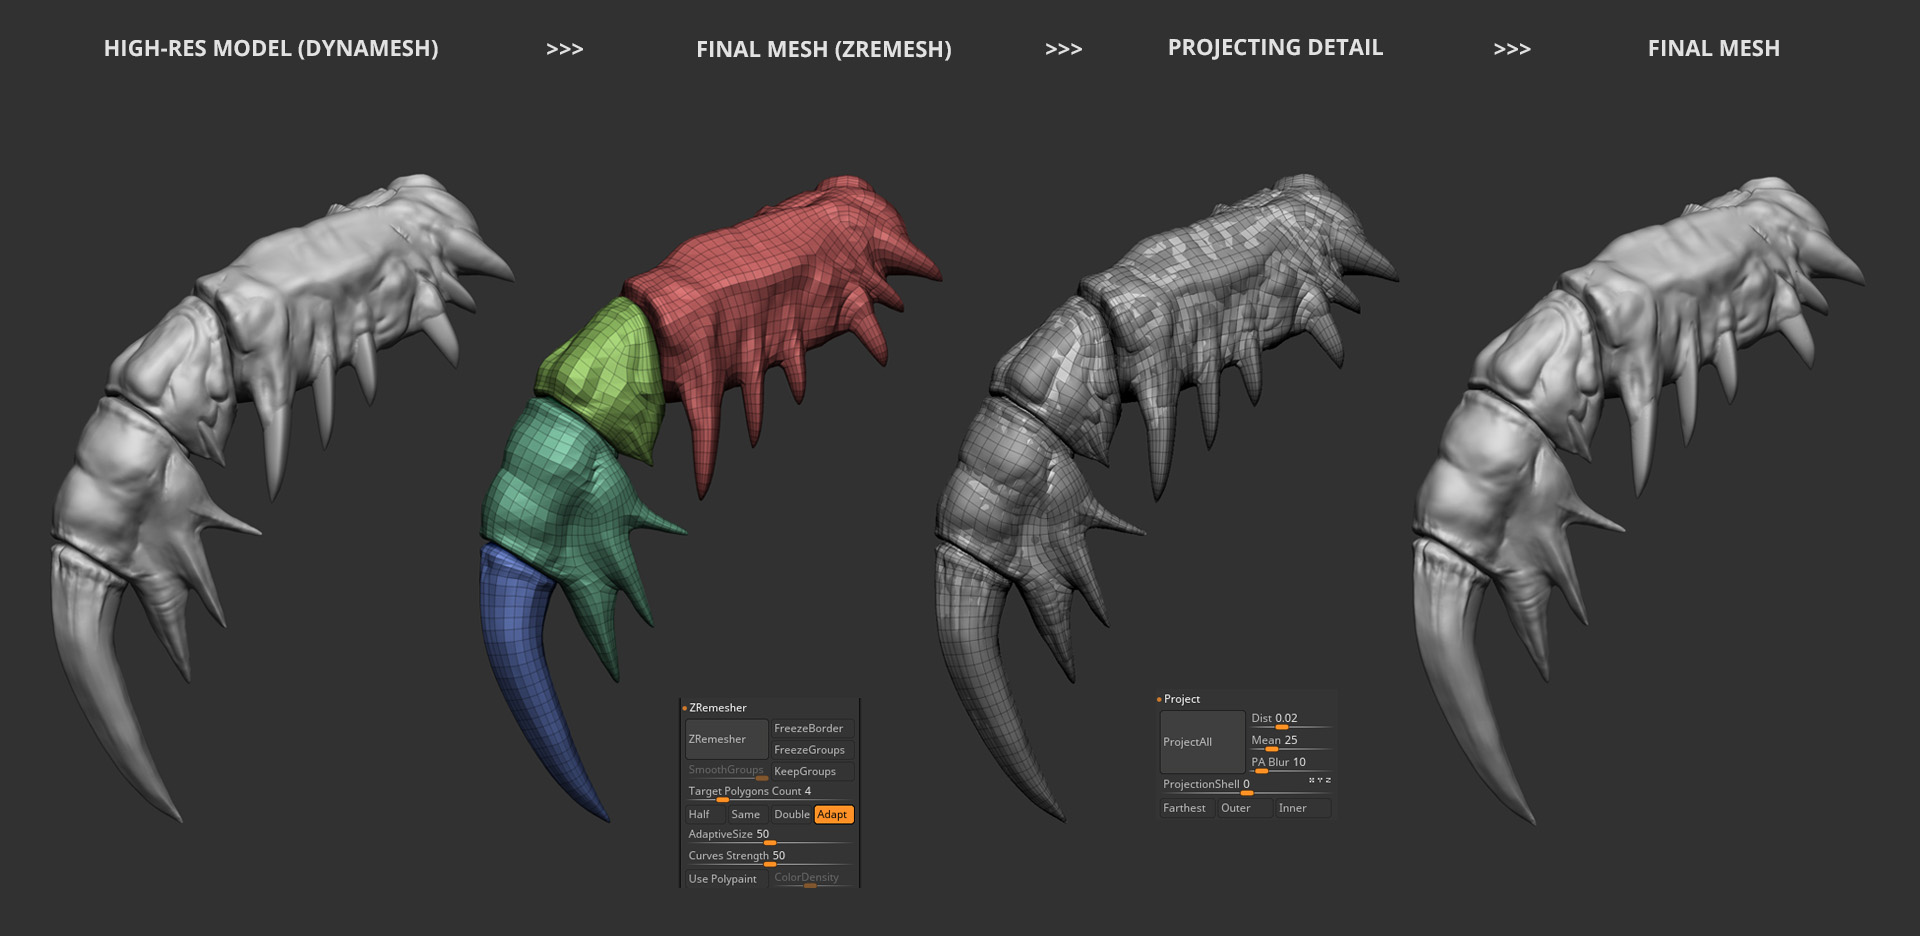
Right before adding more details to the creature, I like to prepare the final mesh. In this case, since the creature is made up of different parts with no need of any specific topology, I relied on the Zremesh tool in ZBrush. Using the arm of the creature as an example, I followed these 4 steps for most of it.
- This is the level of detail I consider enough before starting the retopo. This is my personal preference; maybe other artists take it further before doing the retopo but for me it’s more manageable to add the detail when the final topology and UVs are in place.
- I duplicated the high-res mesh (dynamesh) and apply de Zremesh operation with the default values. I played with the Target Polygon count too. After this process is finished, I exported the mesh to Maya to create the UVs
- I imported the mesh back into ZBrush with the UVs. I make the high-res model visible; it has to be on top of the final model and start the projection process. I subdivide the mesh once at a time and project, to control every step. It’s highly recommendable to use Morph Targets before projecting in case something goes wrong, you can always go back to the original shape and re-project.
- This is the final model ready for next the stage, the details pass.
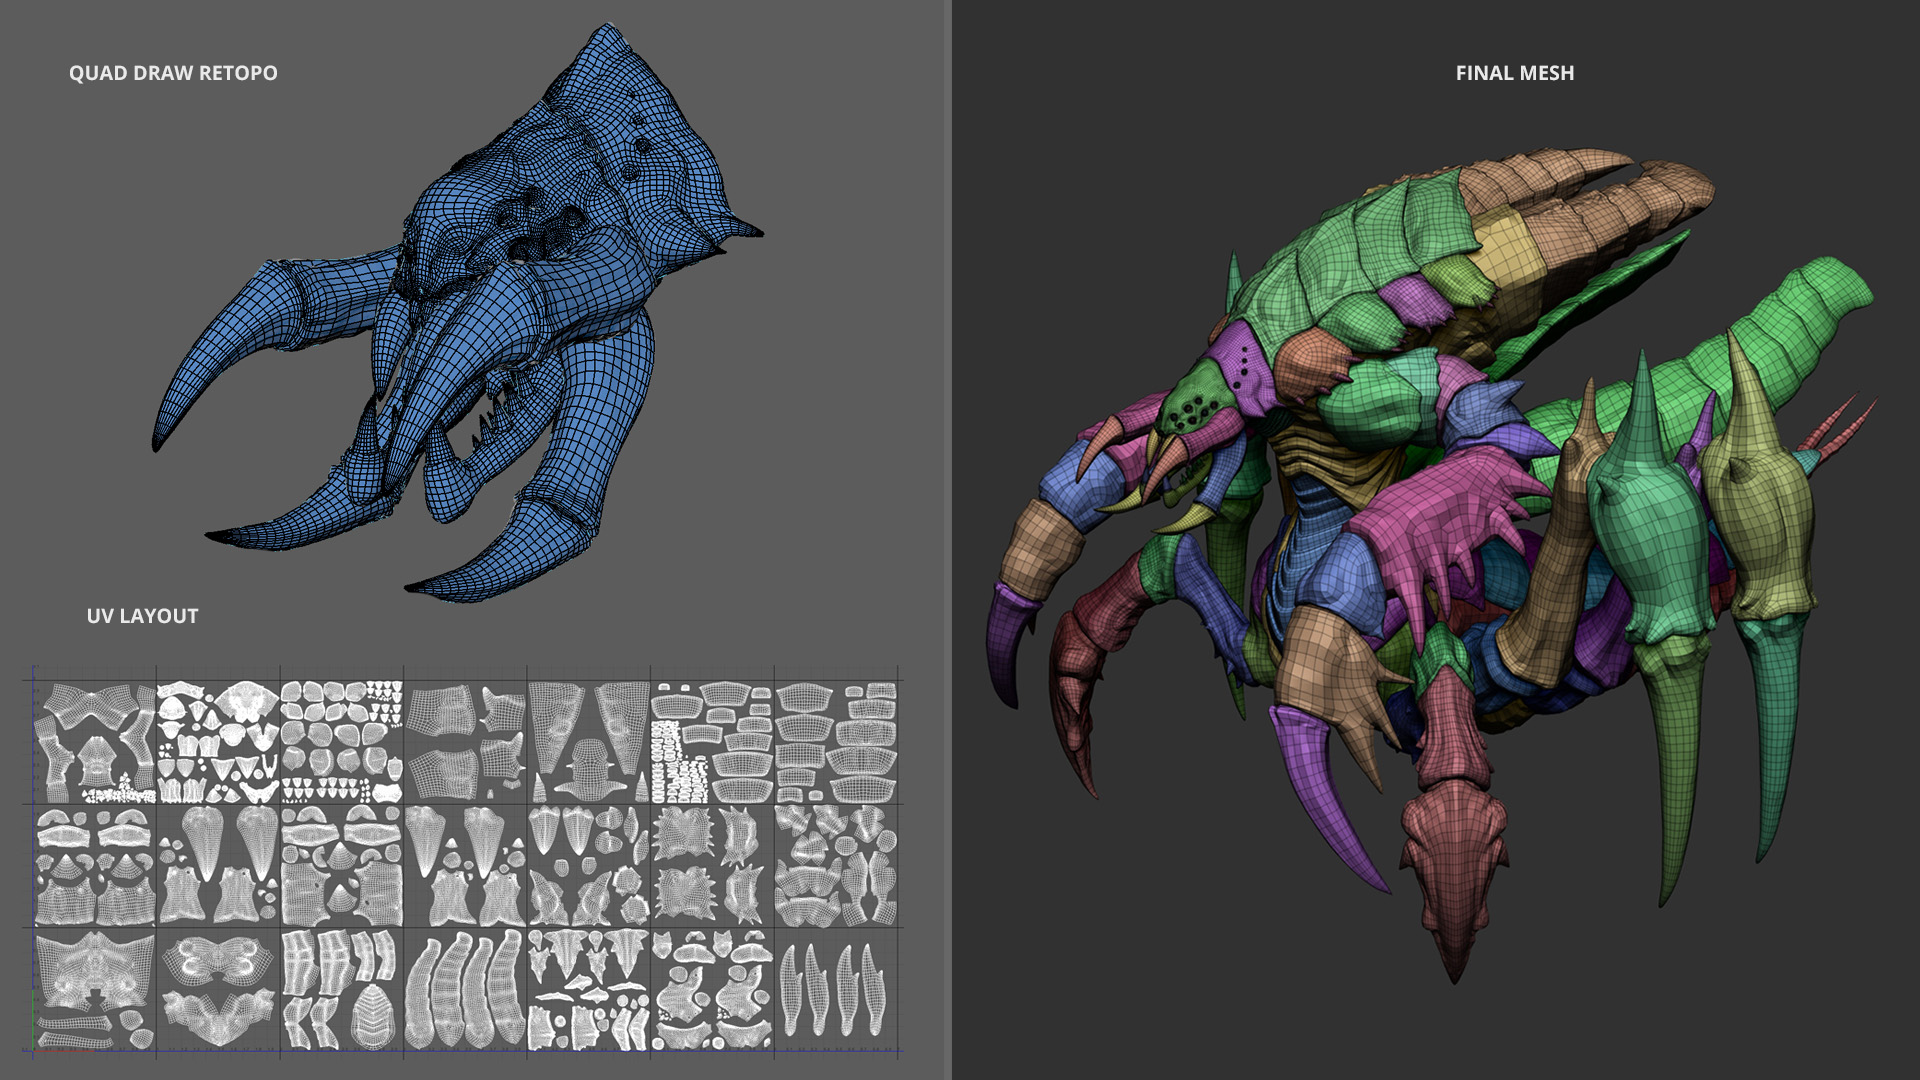
For specific parts of the creature I did the retopo manually in Maya using the QuadDraw tool. And since it’s for production, I opted for the UDIM layout so it would let me have more resolution for the displacement maps and texturing.
Modeling part 3: detailing
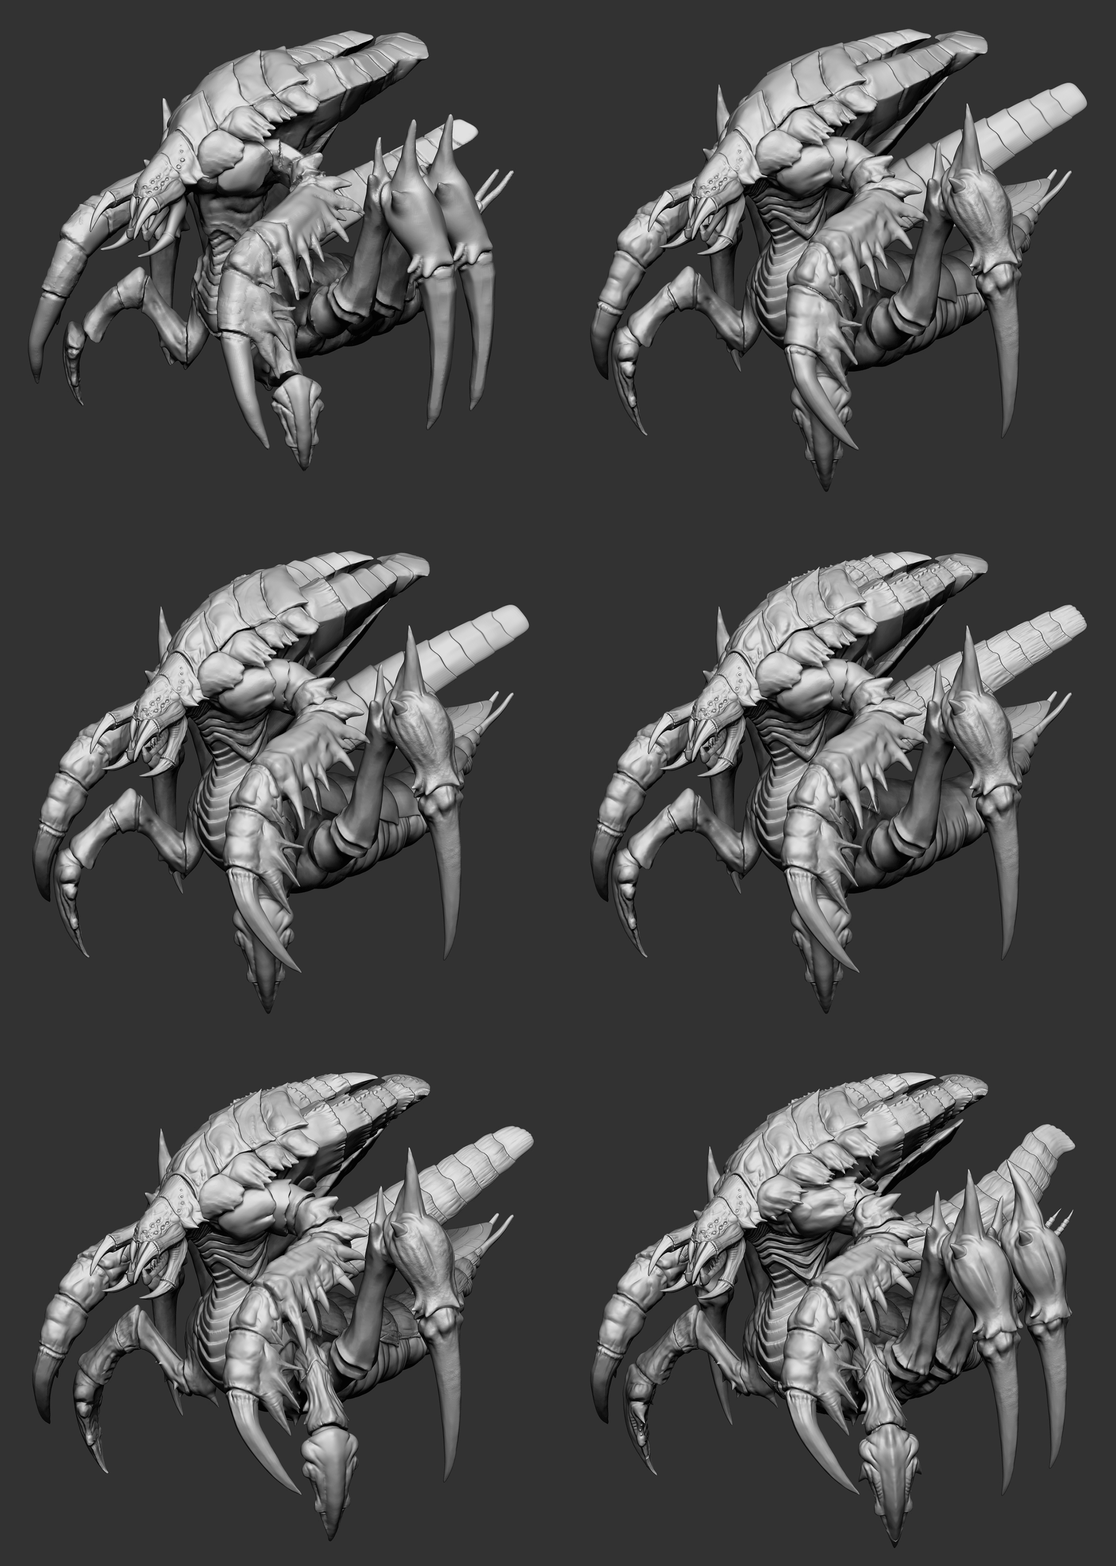
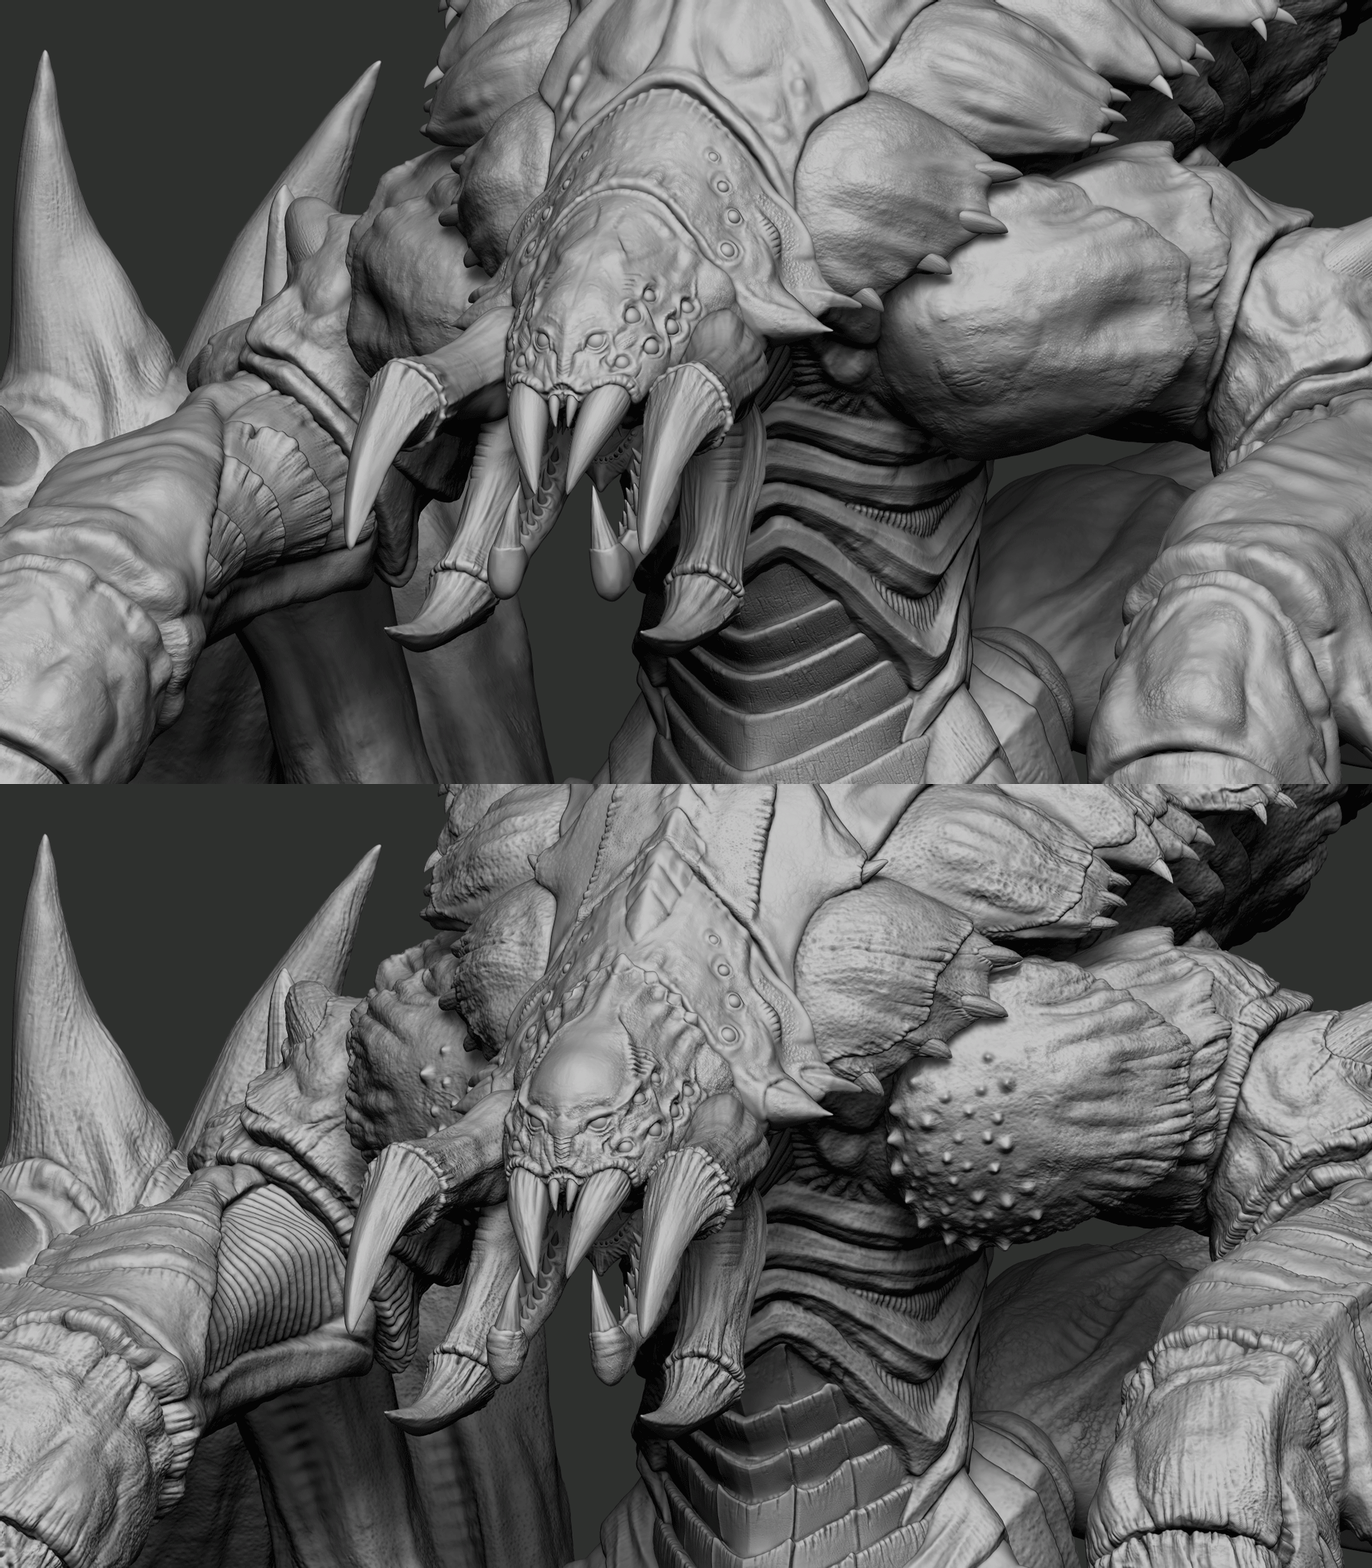
During this stage, as I mentioned before, I decided to move it away from the original crab-style concept and take it to a more kind of Zerg/insect look without changing too much the overall proportions since I really liked those. The process was quite straight forward. I took each piece and tried different shapes with the Standard and DamStandrad brushes until I reached an organic flow that was convincing. I tried to go really heavy into detail in some areas, but leaving others very light so the eye can rest so it doesn’t become noisy.
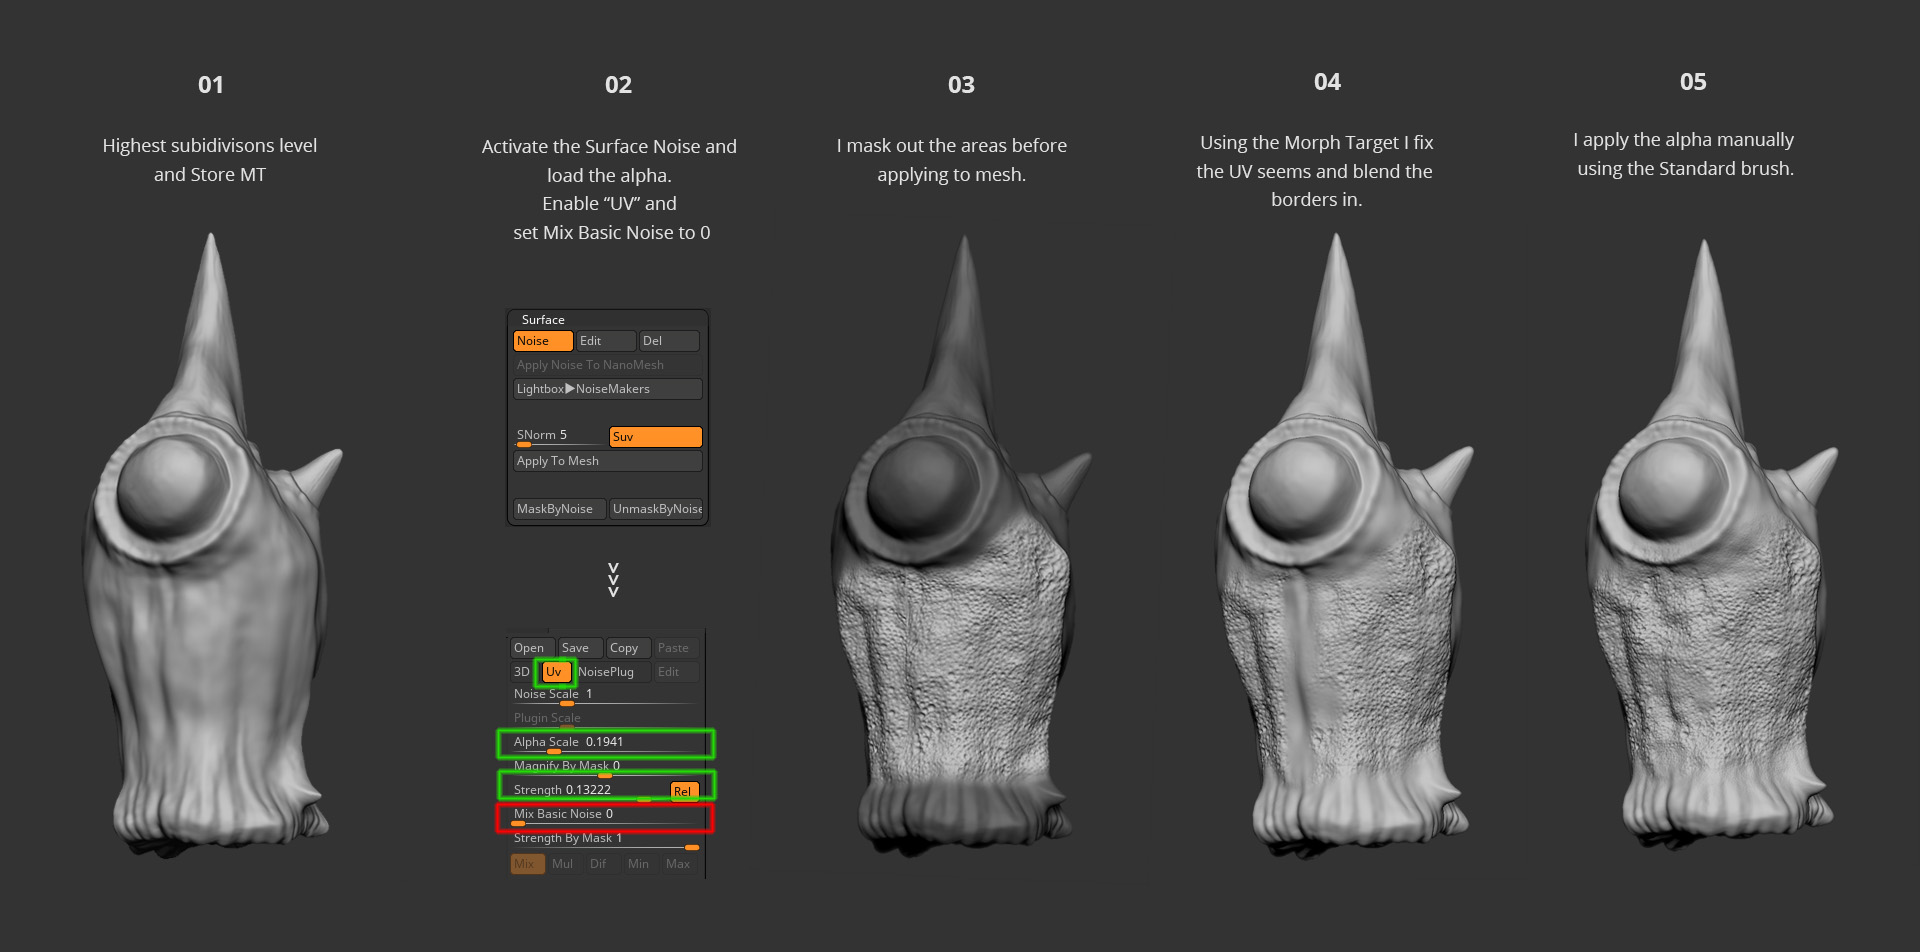
When I need to cover big areas with detail, I find the Surface Noise tool in ZBrush very handy; with no more than 2/3 different alphas I added most of the detail to this model.
Texturing
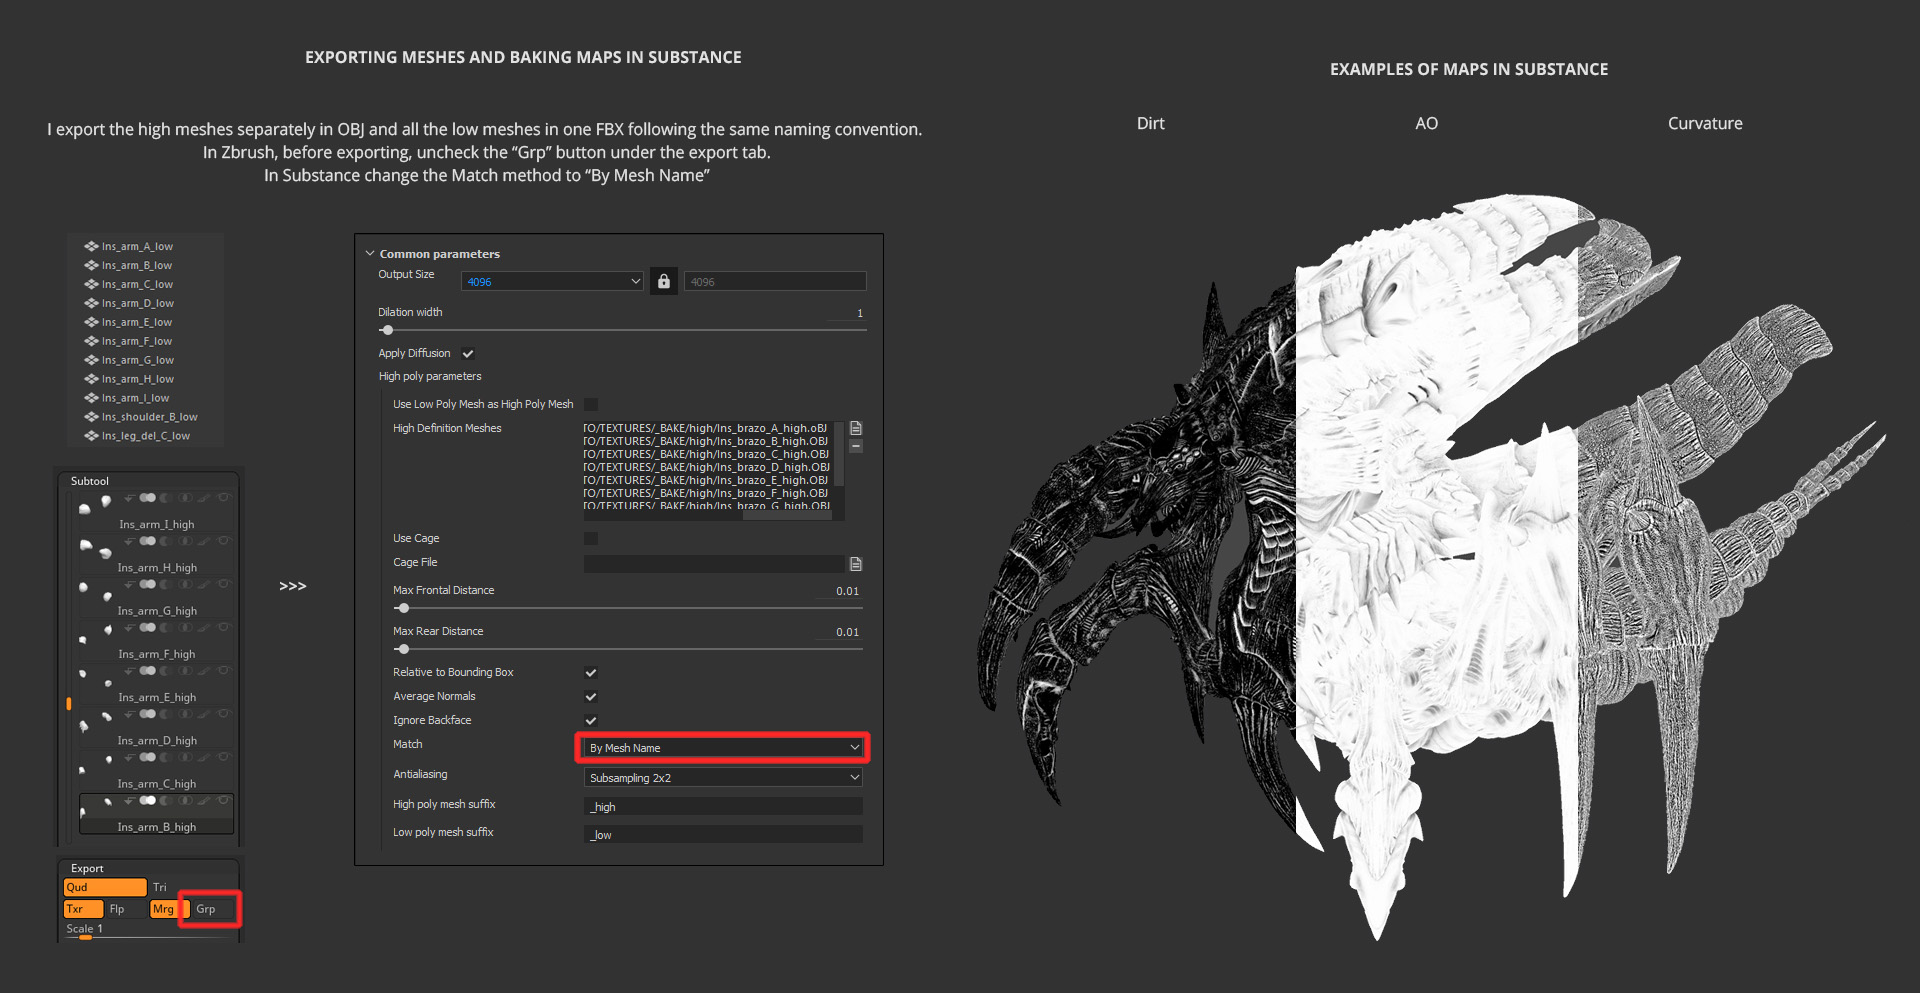
Although Mari was my main tool for texturing since it is the most efficient for working with UDIM, I also used Substance Painter to bake some maps I would use later on in Mari as masks. Since this creature was made of several parts I wanted to control the baking of these maps on how every piece would affect each other, for instance, the Ambient Occlusion, to avoid overlapping artifacts. To do this, I named all the parts in Maya with the subfix _low and in ZBrush with the same name but with the subfix _high. Then, in Substance, it recognizes the pairs of meshes and bakes them accordingly. You can find more information about this here.
I exported the low mesh from Maya using the FBX format because it seems to work better with this “by name” baking method. I generate the basic AO, Curvature and Cavity maps but also some dirt maps using handy smart masks.
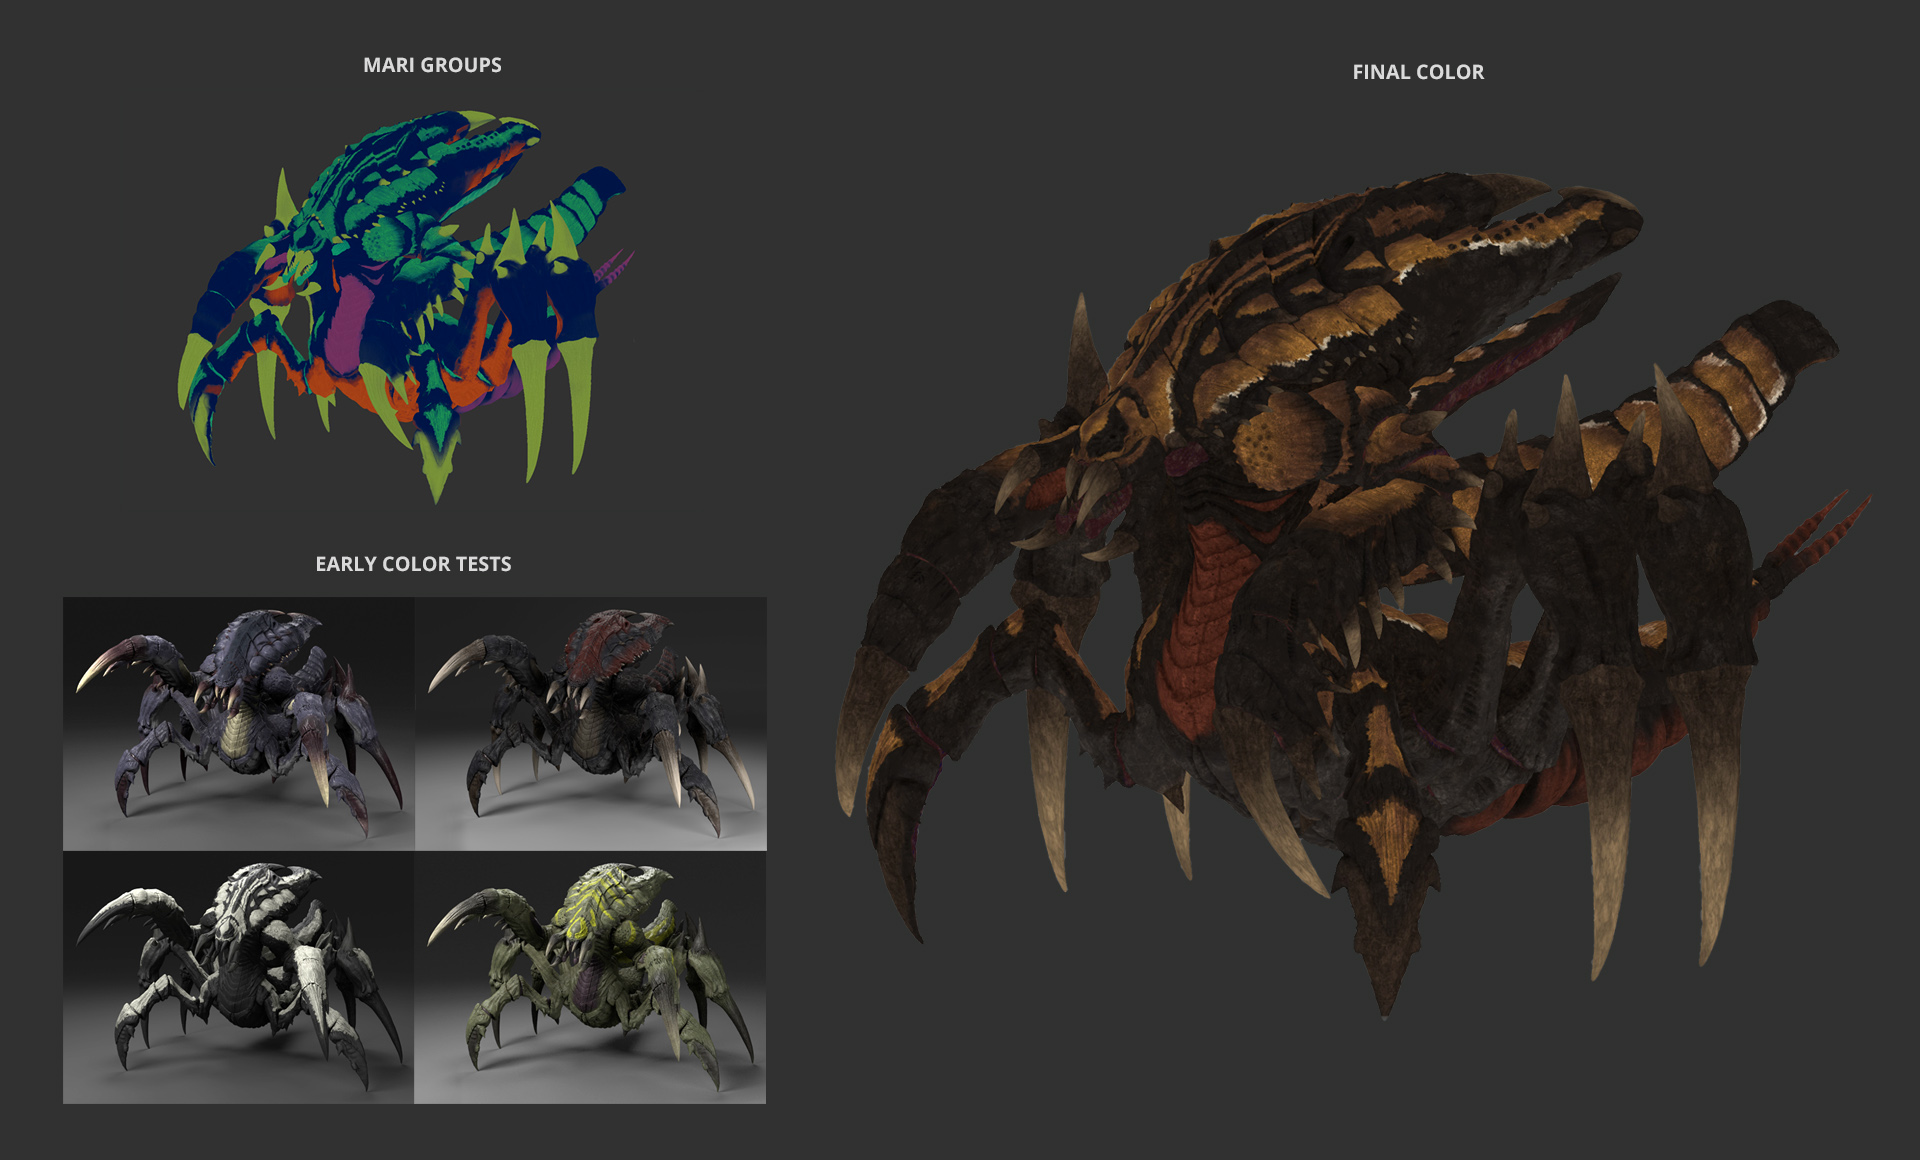
In Mari I create a basic setup of 4/5 groups to work them separately (base color, horns, patterns, bottom, and so on). Within these groups I created a combination of layers and masks with a non-destructive workflow. Nothing fancy, using mainly the Tile node with seamless textures (concrete, dirt) and the base color. I rarely paint any texture by hand; I prefer to use masks to drive the layers. What took me the longest to decide was the color scheme I wanted for the creature. After several tries, I decided to go for the cockroach one, with those gradients of brown and yellow.
Lookdev & render
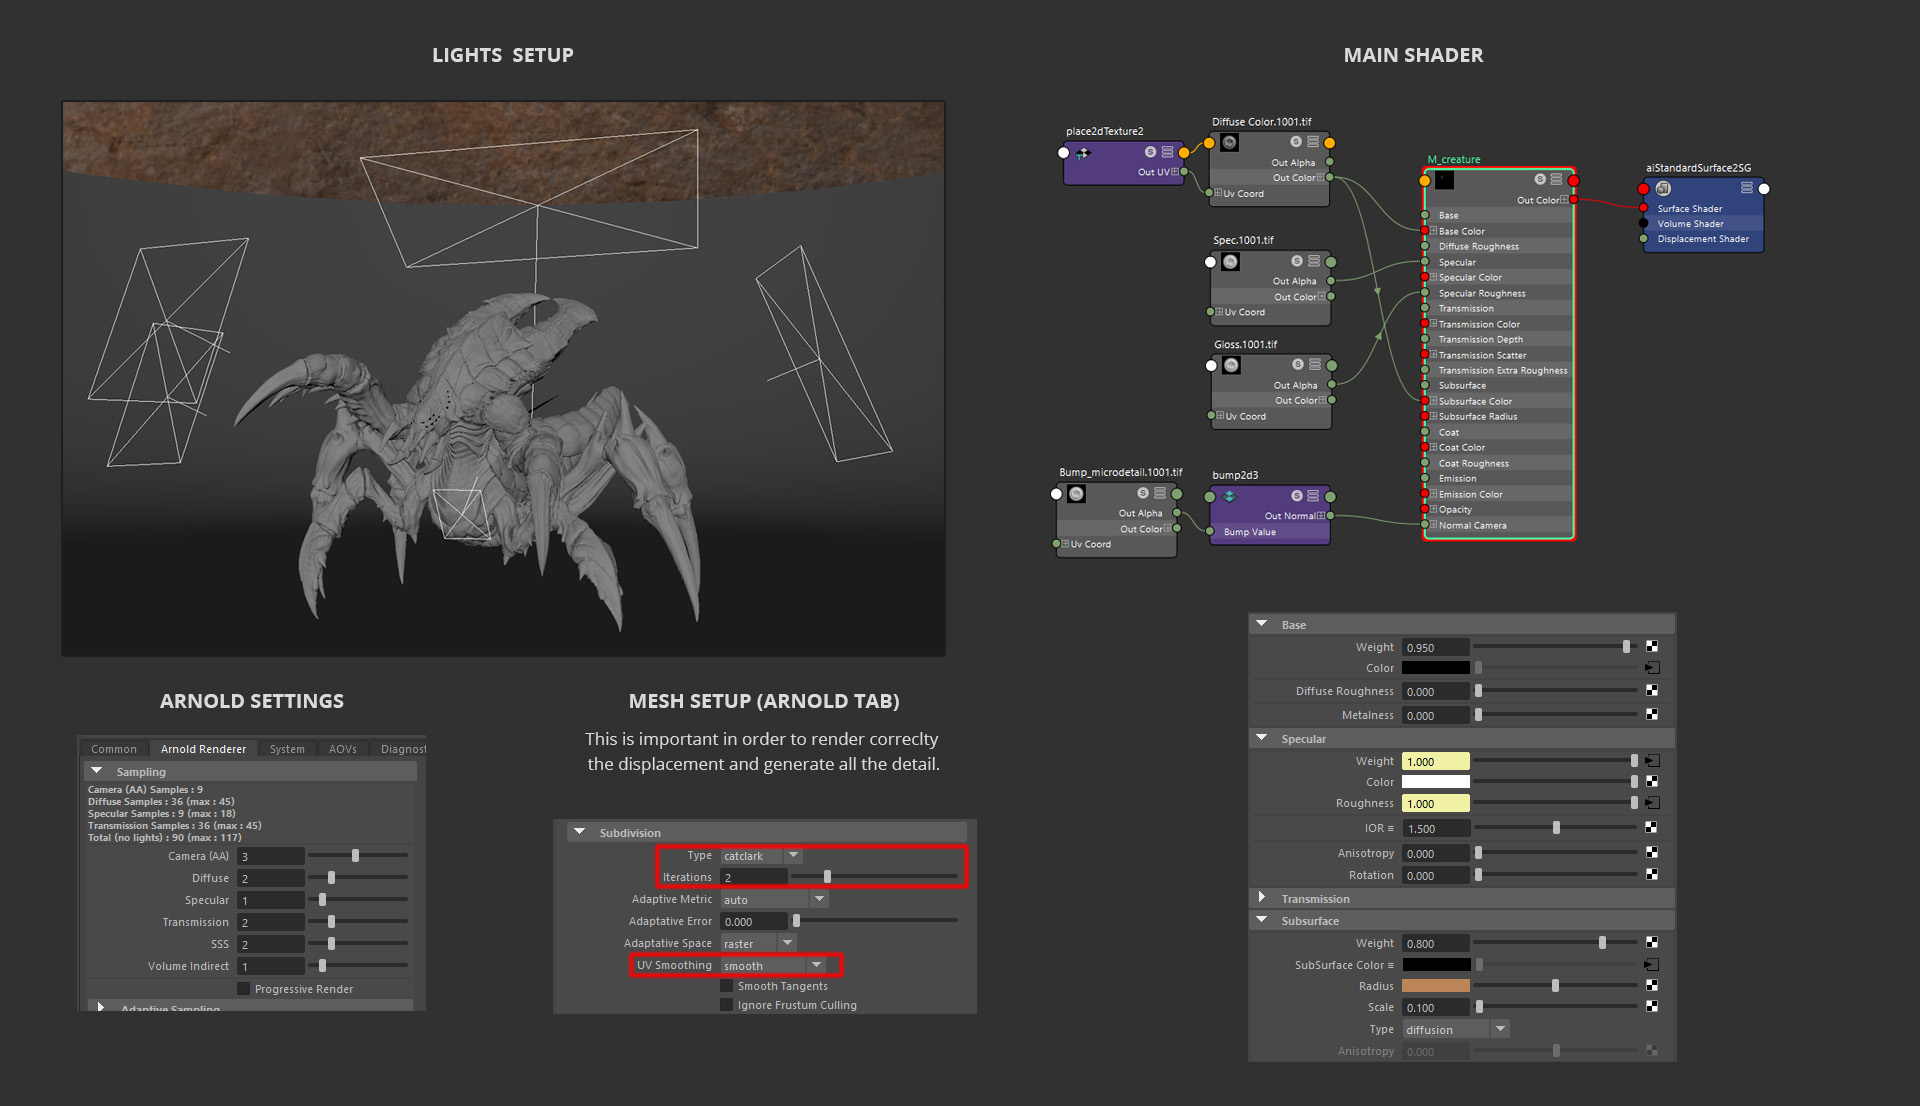
When it comes to lookdev, I always start with a basic setup of a HDRI map and 2/3 area lights to reveal the shapes of the model. Arnold, the render engine used here is powerful, and provides amazing results with just the defaults. I played a bit with the intensity/exposure values of the area lights and, due to the complexity of this creature, I had to use around 6 of these lights to highlight all the details. The shader was the robust aiStandardSurface with the SSS enabled to give a more natural and photoreal look to it.
Displacement EXR maps tip
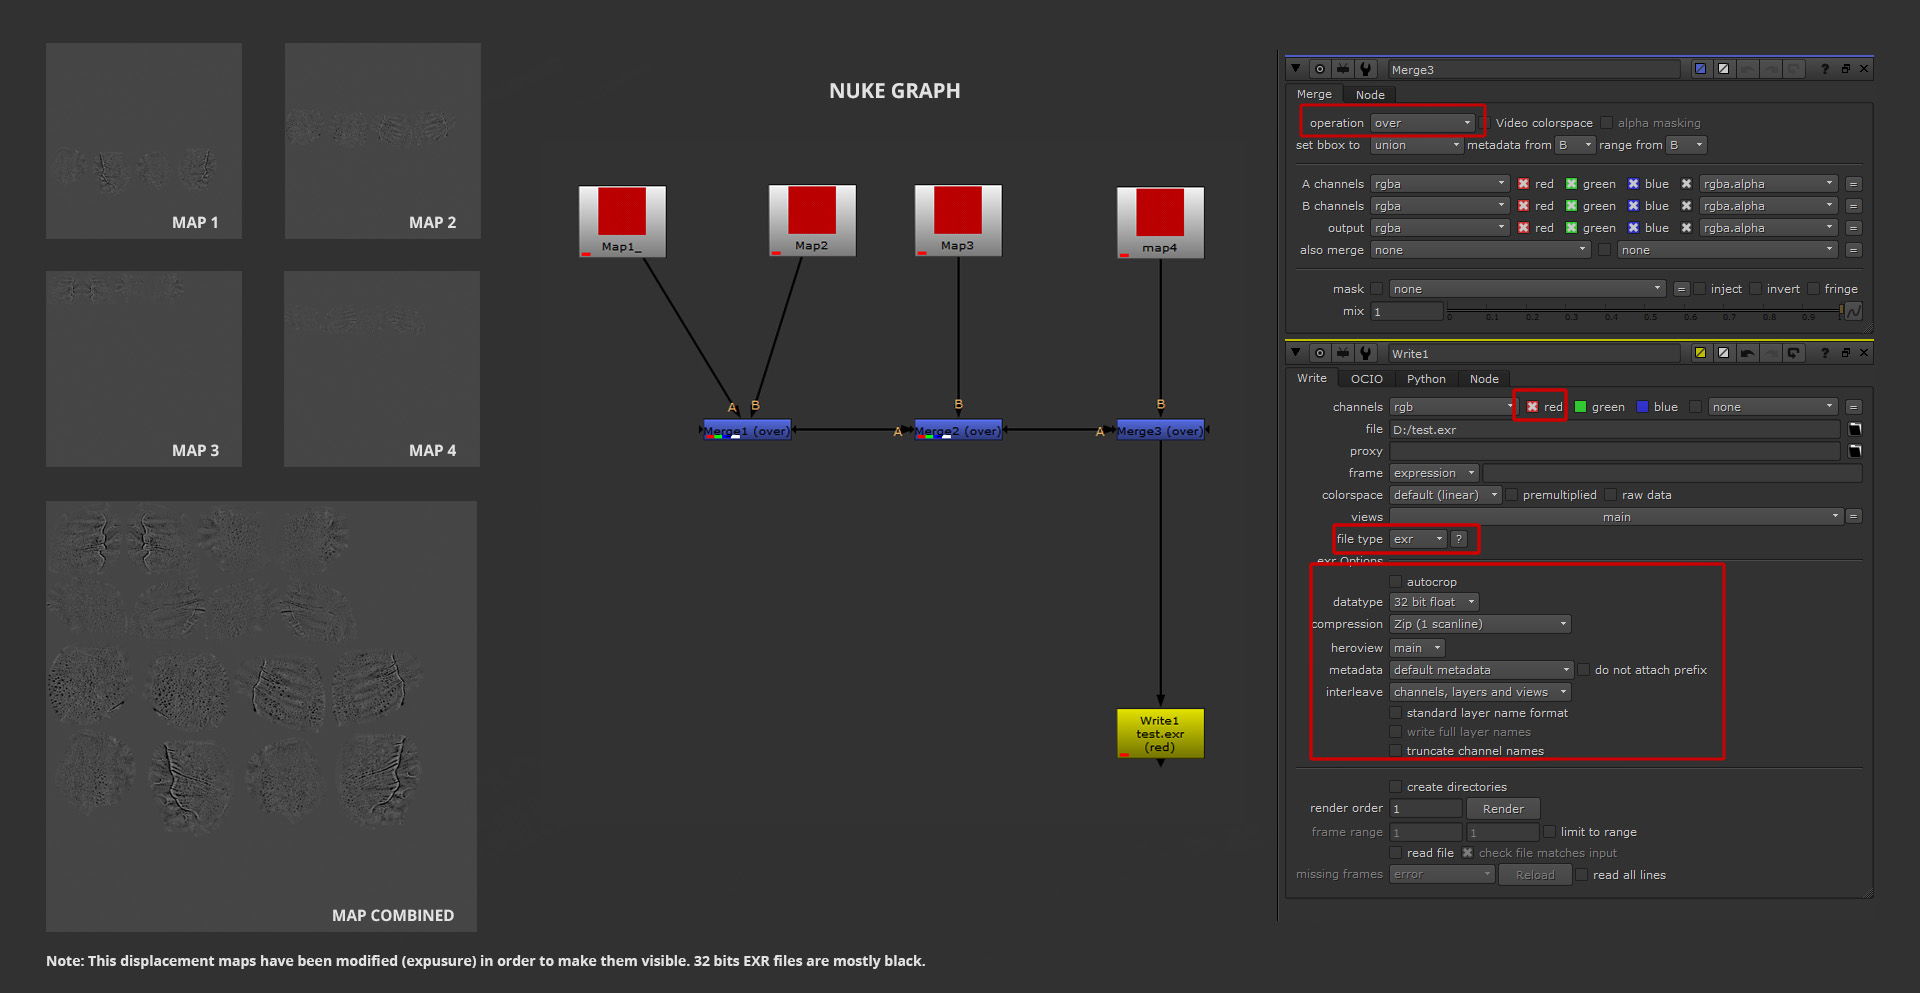
While I was exporting the displacement maps, I found the Merge SubTools in ZBrush didn’t work when you are using 32 bits EXR files. Perhaps in the newer ZBrush versions this bug is solved, I used Nuke to merge the maps of the SubTools that shared the same UDIM space. I imported the maps into Nuke and using the Merge node I combined those maps into one. ZBrush uses the red channel so when you render out those displacement maps you need to check the red channel as shown below. You can also combine Maya EXR maps directly by using the node Float composite.

